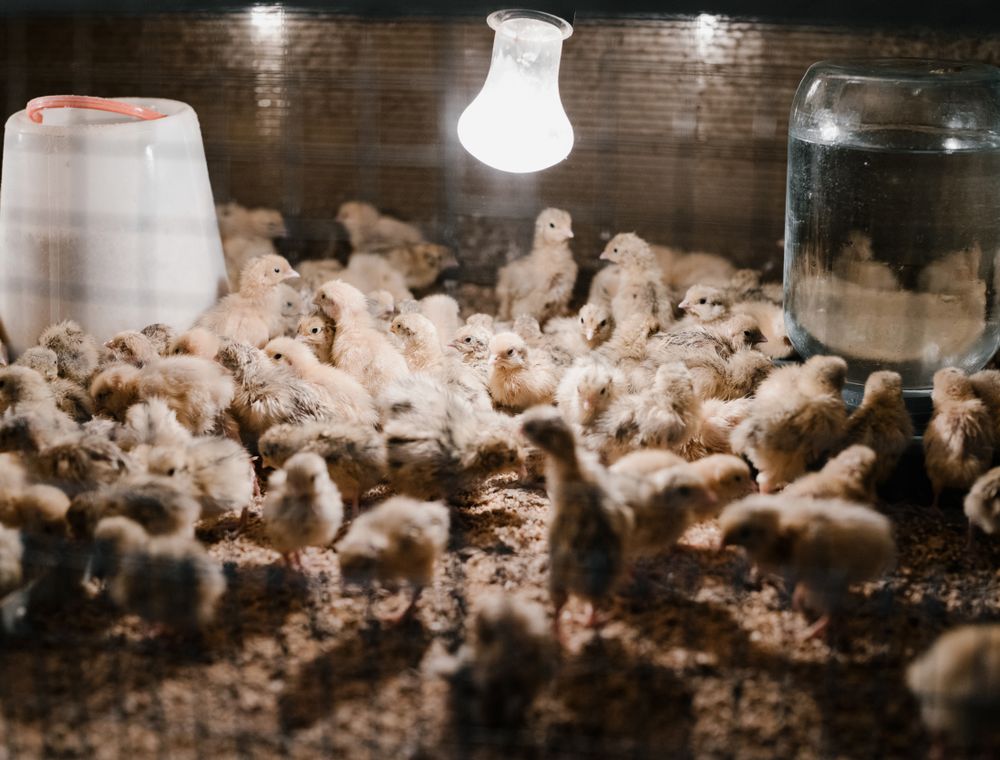
Short answer: Chicks that die in the first week usually die of cold, dehydration, poor access to feed and water, bad air, or an infection they brought with them. The day a chick dies tells you which cause to check first: a death on day one points to chilling and water, while a death on day five or six points to the gut, the air and early infections. Keep a daily record by day and by house, and bring fresh dead chicks to your vet while the cause is still visible.
Key takeaways
- Sort week-one deaths by the day they happen, because each day points to a different set of causes.
- Get water into every chick within the first hours, and make sure feed is in easy reach before the lights go down.
- Watch chick behaviour under the brooder as a thermometer, and adjust the heat before you adjust anything else.
- Keep ammonia down with dry litter and ventilation that does not blow across the chicks.
- Plan for power cuts and rats, because most night losses come from one of those two.
- Bring two or three fresh dead chicks to your vet with a note of their age and the day they died.
Read the day the chick died, not just the number
A chick that dies on day one and a chick that dies on day six have usually been killed by different things. Farmers tend to add the deaths up into one figure, and then argue about whether it is too high. The more useful habit is to ask which day each death happened on, because the answer narrows the search dramatically.
The table is a starting point, not a diagnosis. Real losses overlap, and a bad first night can push a healthy-looking chick into a second problem on day four. Still, if you look at the day first, you will know where to look.
| Day of death | What the dead chicks usually look like | Check these first |
|---|---|---|
| Day 0 to 1 | Shrivelled, dry, found in corners or under others; some with a swollen belly | Chilling, missed water, damaged or weak chicks from the hatch, poor transit |
| Day 2 to 3 | Pot-bellied, slow, with yolk still visible or a sore navel | Yolk sac infection, feed not found, water not reached, heat too low or too high |
| Day 4 to 5 | Thin, dull, crowded in one spot, sometimes with wet vents | Ammonia, damp litter, draughts, early bacterial infection, crowding at night |
| Day 6 to 7 | Weak, dehydrated, with runny droppings or swollen joints | Gut infection, mixed infections, vaccination reaction or timing gaps, rats and power cuts |
Write the day next to every death in the log, and draw a small line through the table once a week. The pattern will show you more than any single bad morning.
Day one: the chick that never found the water
A day-old chick has used up very little of its body water and nothing of its energy stores. That makes it fragile for the first twelve hours, and the first thing it needs is to drink. A chick that has been on the road for a day, in a box, in the heat of a Kasoa afternoon, arrives thirsty. If it does not find water quickly, it weakens, stops moving, and then dies quietly in a corner where you may not see it until the evening.
Put the chicks on water first, before you put them on feed. Dip each beak gently into the drinker when you place them, so they learn where the water is, and keep the drinkers within a few steps of the heat. Use drinkers the chicks can reach easily without climbing or getting trapped, and check after an hour that every drinker has been found. Any chick that is still sitting quiet and not drinking needs to be picked up and handled gently, and your vet can advise on any additions to the water.
- Water drinkers placed where the first chicks will find them without climbing.
- Beak dipping done on arrival, and a count of chicks that do not respond.
- Fresh water at room temperature, changed often in the first hours.
- A quiet check at the end of the first hour, and again before dark.
Keep the box the chicks came in until you have checked it for dead or weak birds. If the losses came from the road, our transit losses guide sorts those from the losses that happen on the farm. Note each one in the log with its house and the time it was found. Those early notes often show whether the loss came from the transport or from the brooder. Our first 48 hours guide walks through the arrival routine step by step.
The first night, and the piles that kill chicks in the corners
Most farmers who lose chicks in the first night blame the heat, and they are often half right. The real problem is that cold chicks pile up. They climb on each other for warmth, and the ones at the bottom of the pile cannot breathe or move. A pile of twenty chicks in a corner can kill several before the morning round, and some of those will look as if they died of something else.

The fix is partly the heat and partly the layout. A brooder with an even warm zone, and a clear area where the chicks can move to if they get too warm, does far more than extra lamps. Stop draughts from the doorway and gaps in the walls, and put a guard or a rolled sack along the wall corners where chicks like to bunch. A little light left on at night helps the chicks find the heat and the water, and stops them crowding in the dark.
Check the brooder at night, at least once, with a torch. Walk slowly and look at the edges. A chick that is calling loudly and moving away from the pile is usually fine. A quiet chick at the bottom of a heap is not.
For a fuller guide to stopping piling, see our piling guide, which goes into the layout in more detail.
Days two and three: feed that is within easy reach
A chick that eats in the first two days recovers quickly from almost anything. A chick that does not eat loses weight, becomes weaker and has less resistance to the next problem. The trouble is that many farmers set up feed trays properly on day one and then let them run low, or fill them with feed that is too coarse for the chicks to pick up.
Spread the first feed on clean paper or in shallow trays, in the warm part of the brooder, and scatter a little on the paper so the chicks peck at it. Refill often, and remove any feed that has become damp or dirty. Use a starter feed that is fine enough for a chick to pick up, and keep it dry. Our chick starter feed guide covers the texture and the storage in more detail.
Check the crops of a few chicks each morning. A full crop in the morning tells you the chick ate overnight. An empty crop on day two is an early warning, and it is one that many farmers miss because the chicks look lively.
Reading the chicks under the lamp
Chicks cannot tell you they are too hot or too cold, but they do show you. The easiest way to read a brooder is to watch the group, not one bird. Stand at the edge for two minutes and look at where the chicks are, how they are moving and what sound they make. Adjust the heat when the behaviour tells you to, and check the thermometer afterwards.
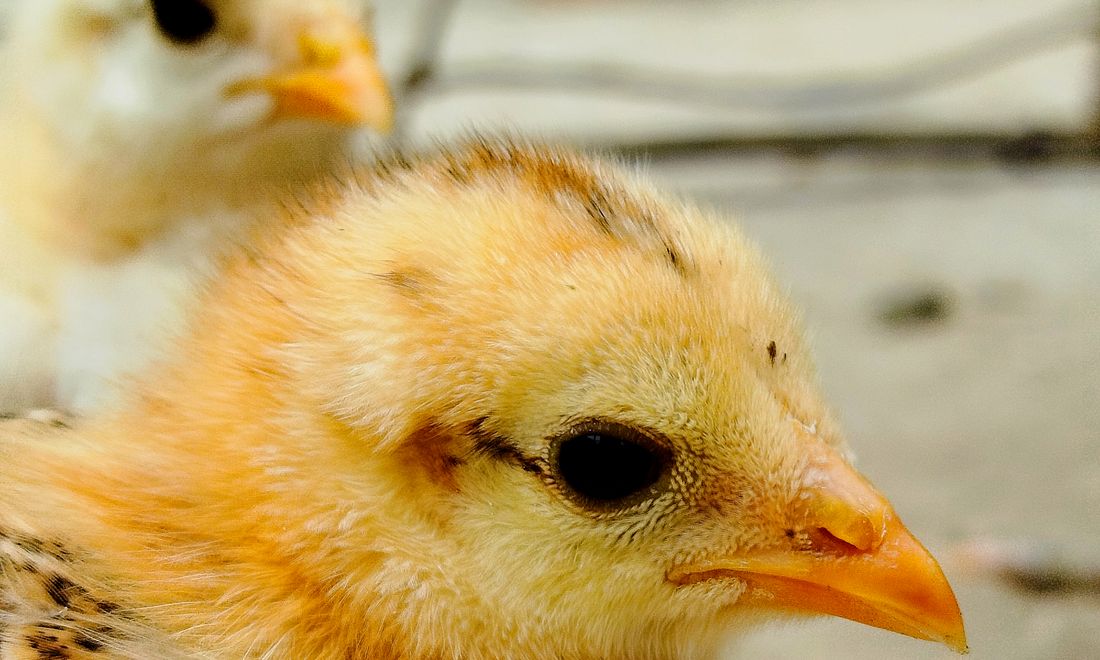
- Spread evenly across the floor, moving and eating: the heat is about right.
- Crowded under the lamp, calling loudly: too cold, or the heat is too low at the edges.
- Pushed to the far walls, panting, with wings held out: too hot.
- Huddled in one corner, quiet: a draught or a cold spot somewhere in the house.
- Chicks gathering at the drinker and not eating: check the water and the feed in the same look.
Make the change slowly. Raise or lower the lamp a little at a time and wait twenty minutes before you judge it. Chicks take time to settle, and a rushed change can start a new round of piling. For the temperatures themselves, our brooder temperature chart gives the readings to work from.
Air, ammonia and the dusty season
Ammonia is the gas that builds up from wet litter, and it hurts young chicks far more than it hurts the grown birds you may be used to. It makes the eyes water, damages the airways and makes the chicks more open to infection. A brooder that smells of ammonia by the second day is already costing you birds, even if the deaths are not yet piling up.
Keep the litter dry from the start. Use a clean, dry litter of the depth your brooder needs, and change the wet patches around the drinkers as soon as they form. Do not wait for the whole floor to look wet. Ventilation has to move air out and bring fresh air in without blowing straight across the chicks. A draught on a cold night kills chicks just as surely as ammonia does.
The seasons in Ghana change the problem. In the harmattan months, from December into February, fine dust from the north gets into closed brooders, and dust mixed with damp litter becomes a thick film that chicks breathe in. In the rainy season, the trouble is moisture and cold draughts through the wet walls. Adjust the brooder for the season you are in, and watch the chicks' breathing as much as their feed.
A chick with a wheezing sound or a runny nose may have an air-related infection, and a common one is brooder pneumonia. Our guide on aspergillosis and brooder pneumonia covers the signs and the steps to take, and your vet should be involved early.
Need chicks for your next batch?
Send breed, number and town. We reply with price, hatch date and delivery cost in writing.
Days four to seven: when the infections show
By day four, the early causes are settling, and the chicks that are left have usually survived the worst of the cold and the thirst. The deaths that appear now are more often infections. Some are bacterial, such as the gut and navel infections that take hold when the environment is poor. Some are viral, from diseases the chicks may have been exposed to before they reached you or after they arrived.
Coccidiosis usually shows later than week one, but a rough first week makes a chick more likely to get it when the time comes. If your flock is due for a vaccination, your vet's schedule decides the day. Our general examples of timing are only that, examples, and your vet knows which diseases are present in your area and what your birds need. Do not assume that the vaccines given at the hatchery are the whole programme.
When chicks die on days five to seven with runny droppings, dull feathers or swollen joints, collect a few for your vet while they are still fresh. Each death you treat as a one-off, without a sample, is one more death nobody can explain.
Rats, nights and the power cut
Two causes that many farmers do not put on the list are rats and power cuts, and both are common enough to be worth planning for. A rat that gets into a brooder at night will take a chick, and it may come back for the next one. Seal the gaps around the doors and pipes, keep feed in closed bins, and check the brooder floor for droppings each morning.
A power cut is more dangerous than it looks. An electric brooder that stops for three hours on a cold night can drop the temperature far enough to pile the chicks and kill a number of them. If you rely on electricity, keep a generator or a gas brooder as a back-up, and test it before the chicks arrive. Our heat source guide compares the options for a farm that has unreliable power. Keep a torch and a spare battery in the house, and know how to get the generator started in the dark.
If the power is off and you have no back-up, you can still save the chicks by gathering them into a box with a warm cloth or a warm water bottle wrapped in fabric, and keeping the box in the warmest room you have. This is a rescue, not a plan. Build the plan before the power fails.
What a dead chick can tell you, if you look properly
A dead chick is the most honest record you have. It will not tell you its story if you only glance at it, but a few minutes of looking will often show you where to start. Pick out two or three that died on the same day, and lay them on clean paper in a bag, with the house, the age and the time of death written on the label.
Look at the belly first. Is the yolk sac still large, or dark, or does the navel look wet? Check the crop: is it full, empty or sour? Look at the feet and legs for swelling, and at the eyes and nostrils for discharge. Note whether the chicks were crowded at the bottom of a pile, which tells you about the night rather than the disease.
Take the samples to your vet while they are still fresh, and ask how they want them kept until the visit. A chick that has been left out in the sun for two days tells the vet very little. Send a short written note with them, saying what you saw and when, because the vet will ask the same questions you can answer now.
A week-one routine that prevents most losses
Most week-one losses are not caused by one dramatic failure. They come from a handful of small things that were not checked on time. This routine takes about fifteen minutes a day once it is set up, and it catches most of the problems before they become deaths.
- Before the chicks arrive: heat tested at chick height, water and feed ready, litter dry, back-up power checked.
- On arrival: count the chicks, beak-dip them at the drinker, and note any that are dead or weak.
- First hour: check that every drinker has been found and that feed is being picked up.
- Before dark: check the heat, the piling, the water and the feed, and leave a light on if needed.
- Night check: walk the brooder with a torch and listen for quiet chicks in the corners.
- Morning round: count the dead, note the day, check the crops and the droppings, and write it all in the log.
- Every day: change wet litter, refill water, refresh feed, and check for rat signs.
- Day seven: weigh a sample of chicks and compare with the batch record and your expectations.
If your count goes up two days in a row, stop and call your vet. Do not wait for the week to end. Our common chick diseases guide lists the problems to look for, and the vet can tell you which of them fits your case. If a week-one problem leads you to restock a house later, our restocking guide sets out the order of work.
When you are ready to bring in the next batch, message us on WhatsApp at +233 24 915 1503, or place a request through the order form. Our day-old chicks page explains how the batch is packed and what you should expect on arrival.
Questions farmers ask
What is the most common cause of chick deaths in the first week?
In most farms, chilling and poor access to water are the first suspects, especially for deaths on day one. Piling in the corners at night is a close second. After that come feed that is hard to find, ammonia from wet litter, and infections that came with the chick. The day of the death tells you which of these to check first.
Why do chicks die on the first night even when the brooder looks warm?
The brooder can look warm at the lamp and still be cold at the edges, where the chicks spend the night. Draughts through gaps in the walls and doorways also cool the corners. Cold chicks pile up, and the chicks at the bottom of the pile are crushed or smothered. Check the edges with a thermometer and look at the corners with a torch.
Should I give the chicks anything in their water on arrival?
Ask your vet before you add anything. Some farmers use simple additions in the first hours, but the right choice depends on your chicks and your conditions, and some products interfere with vaccines given through water. Whatever you use, give clean water first, and make sure every chick can reach it.
How do I know if a chick's navel is infected?
Look for a navel that is red, moist, swollen or smelly, and for a chick with a large belly that is slow to move. A closed, dry navel is what you want to see. If you are unsure, take a dead or dying chick to your vet while it is still fresh, and ask them to check the yolk sac and the navel with you.
Is it normal to lose a few chicks in the first week?
Some loss can happen, but the question is what the loss looks like and whether it is getting worse. Keep the daily count, and compare it with the day before. A count that rises two days in a row is a reason to call your vet, whatever the total number is. A single bad morning is worth noting but not always worth panic.
Can rats kill chicks in a brooder?
Yes. Rats can take chicks, especially at night and in brooders with gaps around the floor, doors or pipes. Seal the gaps, keep feed in closed containers, and check the floor each morning for droppings or missing chicks. A rat sighting is a reason to check the whole house, not just the spot where you saw it.
How do I keep the brooder warm during a power cut?
Have a back-up in place before the chicks arrive. A generator or gas brooder that you have tested is the safest option. Without one, keep the chicks in a smaller warm box, wrapped in cloth, in the warmest room you have, and check them often. Build the back-up plan now rather than during the next outage.


