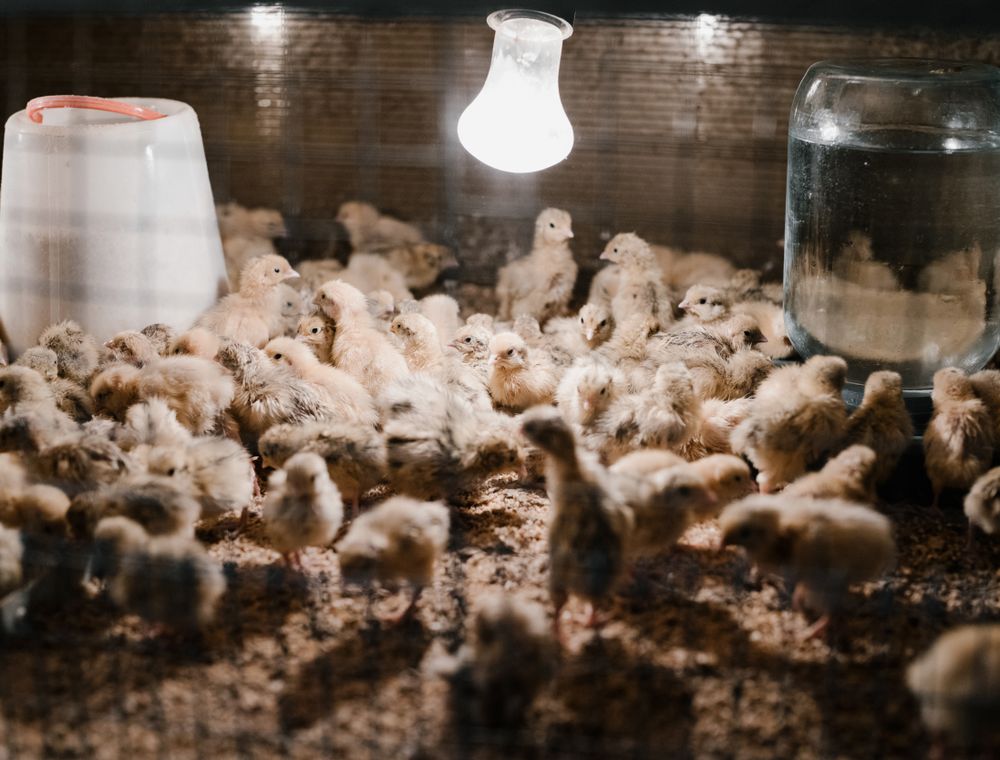
Short answer: An infrared bulb on an adjustable hanger is the usual starting point for a small Ghanaian brooder, but it stops when the power does, so plan a backup. Gas gives the strongest, steadiest heat and keeps working through a blackout, provided the fittings are sound and the room is ventilated. Charcoal is cheap to buy and dangerous to run in a closed room, so never burn it where chicks and people are shut in together.
Key takeaways
- Choose the heat source you can keep running every night, including during power cuts, not the cheapest one on the day you buy.
- Infrared bulbs are simple and adjustable, and they stop when the power does.
- Gas gives strong, steady heat, but a loose fitting or a leak is a serious hazard.
- Charcoal produces carbon monoxide, so it has no place in a closed brooder room.
- Work out running costs from hours and measured use, then check them against your ECG bill or your cylinder refills.
The chicks need heat, not light
A lamp does two jobs in a brooder, and only one of them matters to the chicks. The heat keeps them warm. The light lets them find feed and water. Plenty of farmers buy an LED bulb for light and then wonder why the chicks pile up at night. An LED gives almost no heat, so a bright, cold brooder is still a cold brooder. Heat is the job, and every source below is judged on how well it does that job.
Two things set the choice: how much heat the brooder needs, and how reliably you can keep that heat running for the four weeks. A source that heats perfectly on a sunny Sunday and fails at midnight during a power cut on Tuesday is the wrong source for your farm, however good its specification sheet looks.
Before you choose, make sure the brooder itself is set up sensibly. Our brooder setup guide covers the ring, the floor and the layout, and the heat source should fit into that plan rather than being added at the end.
Infrared bulbs: the common starting point
Most small brooders in Ghana run on infrared heat bulbs, often 250 watts, hung on a chain or hanger above the litter. The attraction is simple. The bulb costs little, replacing one is easy, and the height is adjustable. Raise it to spread the heat, lower it to make a warmer spot, and switch it off when the chicks no longer need it. A bulb on a thermostat, where you can get one, beats a bulb on a plain switch, because the temperature holds without anyone watching it.
The weaknesses are the power and the heat itself. The bulb stops when the electricity stops, and a power cut at 2 am leaves a box of chicks cooling in the dark. Bulbs also get very hot. Keep them away from cardboard, paper and wooden frames, guard them with a wire cage, and check the flex for cracks at every visit. In the rains, damp wiring and sockets are a fire risk, so keep the fittings dry and off the floor.
On a large brooder, use two or three smaller points rather than one high bulb over the whole ring. Separate points let you make a warm end and a cooler end, and the chicks then have a choice of temperature, which is exactly what you want from a brooder. The broiler house setup guide shows where those points fit inside a full house.
Gas brooders: strong, steady and unforgiving
A gas brooder, usually a hood or an infrared burner fed from a small cylinder, produces strong and even heat. It is less affected by the outside air than a bulb, and it keeps working through a blackout if the burner lights without electricity. For a larger brooder, or a house that gets very cold in the harmattan, gas is often the most dependable choice in Ghana.
Gas is also the hazard people underestimate. A loose fitting, a cracked hose or a regulator that is not seated properly can leak gas into a shed. Before you light, check every joint. Brush soapy water on the connections and watch for bubbles. Keep the cylinder upright, outside the brooder and away from the flame. Ventilate the room well, so that any leak and the combustion gases cannot build up. Never leave an unattended flame in a room where you are asleep, and close the valve at the cylinder when you leave.
Position matters as much as the burner. Fix the hood so that chicks cannot walk into it or pile against its edge, and put a guard around it. A chick that finds the hot rim of a hood can burn its feet, and a group that bunches tight against the surface can overheat the birds at the bottom of the pile.
Charcoal and wood: cheap, smoky and dangerous indoors
Charcoal brooders are still common, because the fuel is cheap, the pots are simple and the heat is familiar. We do not recommend them for a closed brooder. Charcoal burns with incomplete combustion, and in a closed room it produces carbon monoxide, which is odourless and can kill people as well as birds. The smoke is hard on young chicks' lungs, and a pot that tips over sets litter and cardboard alight.
If you must use charcoal, the only safer setting is a well-ventilated space, never a room where people sleep and never a sealed house with the doors shut. Keep the pot stable and off the floor, and never leave it burning unattended. Wood carries the same problems, and so does paraffin. The money you save on the heater is small next to the cost of a fire or a lost batch, so spend it on a source that does not burn inside the house.
Heat sources side by side
The table gives relative figures on purpose. Prices change between suppliers and between months, so put your own numbers against the list. What does not change is the shape. A bulb is cheap to start and needs a backup. Gas costs more to start and is the most resilient when the power fails. Charcoal is cheap to buy, but it is the one that can hurt someone when it goes wrong.
| Source | Start-up cost | Running cost | Heat control | Works in a power cut | Main hazard |
|---|---|---|---|---|---|
| Infrared bulb on a hanger | Low | Medium, by kWh | Good, by height and number of bulbs | No | Fire from bulbs touching litter or cardboard |
| Gas hood or infrared gas burner | Higher | Medium, by cylinder use | Good, with a regulator or thermostat | Yes, if it lights without power | Gas leaks and loose fittings |
| Charcoal pot | Low | Low to medium, by fuel used | Poor, needs constant attention | Yes, but needs fuel | Carbon monoxide and fire |
| LED or light-only bulb | Low | Low | None for heat | No | Chicks chilled, because a light is not a heat source |
If you are comparing the bulb with the gas hood for a particular batch, the question to ask is which one you can keep running on the coldest night of the month, not which one is cheaper on paper.
Working out what each heat source costs to run
Running cost is easiest to work out from the rating plate and the hours. For a bulb, the arithmetic is kilowatt-hours. A 250 watt bulb uses a quarter of a kilowatt-hour an hour. Run it for 12 hours at night and it uses 3 kWh a night. A week of nights is 21 kWh, and a 30-day month is about 90 kWh. Multiply that by your tariff per kWh from your ECG bill to get the monthly cost. Check the tariff on the bill itself, because it changes.
For gas, read the burner rating on its plate, usually in kilowatts or kilograms per hour, and multiply by the hours it runs each night. Compare the result with how much gas a full cylinder holds, and you know roughly how many nights one cylinder lasts. Note the refill date and the price you paid. After three refills you will know your real cost per night, which beats any estimate on a leaflet.
For charcoal, measure rather than guess. Weigh the fuel you put in at dusk, and weigh what is left at dawn, for a full week. Subtract the leftover from the total you fed in and divide by seven, and you have your average nightly use. Fuel prices move with the season, so update the figure each time you buy.
A quick example makes the comparison clear. A single bulb running all night for a month costs about 90 kWh. A gas burner that uses a set amount of gas each night might need a refill every few weeks. The two numbers look different, but once you multiply each by the price you actually pay, you have the figure that goes into your budget.
Power cuts and dumsor: planning the backup
If the brooder depends on electricity, you need a plan for the night the power goes off. The simplest plan is a second heat source that does not need the grid. A gas burner on standby, a second cylinder ready to fit, or a small backup on an inverter or generator, if you have one, all count. Test the backup before you need it, not in the middle of a blackout.
Keep a thermometer with a min/max memory in the brooder, so that when the power comes back you can see the lowest temperature reached during the cut. If the chicks were chilled, watch them over the next few hours for slow movement and pasty droppings. Write the outage down with its time and length. A pattern of cuts on certain nights helps you plan the next batch and choose the heat source that fits it.
The same thinking applies to the water. A cut that stops a pump can leave drinkers empty, and the first sign is often a flock that has gone quiet. Our chick starter feed guide covers the feed side of the first weeks, and water and feed both need checking after an outage.
Need chicks for your next batch?
Send breed, number and town. We reply with price, hatch date and delivery cost in writing.
Choosing the heat for each season
The season changes the job. In the harmattan, nights are dry and cold, dust hangs in the air, and the house needs more heat for longer. This is where a steady gas burner, or several bulbs on a thermostat, earns its keep. In the hot dry spell from February into March, heat can be cut back earlier, and a bulb that is easy to raise and lower is the better tool. In the rains, humidity makes the brooder feel colder, damp litter pulls heat out of the floor, and electrical fittings corrode. Dry your fittings, keep the floor dry and keep the backup ready.
Many farms run a bulb for the first two weeks, then move the chicks onto a lower setting while keeping a source available for the cold snaps. That is a sensible plan. What matters is that the heat is there at the coldest hour of the night, not just at the time you wrote in the notebook. The brooder temperature chart sets out the target for each week, and the heat source has to be able to hit it.
Safety checks before you light anything
- Check the wiring, plugs and flex for cracks, and replace anything damaged before the chicks arrive.
- Guard every bulb, and keep cardboard, paper, wood and litter well clear of the heat.
- For gas, leak-test every joint with soapy water and check the hose for cracks before you light.
- Keep the cylinder upright, outside the brooder, and away from the flame and any other heat source.
- Ventilate the room, and never burn charcoal or wood in a closed space with chicks.
- Fit a thermometer at chick height with a min/max memory, so you know what the night did.
- Have a backup for the power cut, and test it before the batch arrives.
- Keep a fire extinguisher where you can reach it from the brooder door.
Check these again on the day the batch arrives, and if something looks doubtful the FAQ page answers the common questions about brooder power. A heater that worked last month may have a loose plug now, and the rains are hard on fittings that sit near the floor.
Mistakes that cost chicks with brooder heat
- Buying an LED and calling it a heater.
- Hanging the bulb too high and forgetting that the edges of the ring are chilled.
- Using one bulb for a large ring, so the chicks have no choice of temperature.
- Trusting a bulb on a plain switch to hold heat through the night.
- Storing gas cylinders inside the house, or leaving a hose across the floor.
- Burning charcoal in a room where people sleep, to warm everything up on a cold night.
Before you commit to a heat source for a full batch, check the box sizes on our broiler and layer pages, so the brooder is planned for the number you are actually raising. If you are raising a small flock of cockerels, the cockerel farming guide shows how the heat plan fits into the wider budget. When you are ready to order, the order form is on the homepage, and the day-old chicks page has the details of each box.
Questions farmers ask
Are LED bulbs enough to heat a brooder?
No. An LED gives light, and very little heat. Chicks need warmth at chick level, and a bright, cold brooder will still leave them piling up at night. Use an infrared heat source for warmth, and an LED if you also want a light for checking the birds.
Which heat source is best for brooding in Ghana?
There is no single best source. Infrared bulbs are the usual starting point for small brooders because they are cheap and adjustable, but they need a backup for power cuts. Gas gives strong, steady heat that survives a blackout when the burner lights without power. Charcoal is the one to avoid indoors.
Is a gas brooder safe to use in a farm shed?
It can be, if it is fitted and used properly. Check every joint with soapy water before lighting, keep the cylinder upright and outside the brooder, ventilate the shed, and guard the hood so chicks cannot reach it. Never leave an unattended flame in a room where you are sleeping.
Can I use charcoal to brood chicks at night?
We advise against it in a closed house. Charcoal produces carbon monoxide, which can harm or kill people and birds, and the smoke irritates young lungs. If you have no other option, use it only in a well-ventilated space that no one sleeps in, and never leave it burning unattended.
How do I work out the running cost of a brooder bulb?
Watts multiplied by hours, then divided by 1,000, gives kilowatt-hours. Take a 250 watt bulb running 12 hours a night: that is 3 kWh, or about 90 kWh over a month. Multiply that by your tariff per kWh from your ECG bill for the monthly cost.
What do I do when the power goes off overnight with chicks in the brooder?
Switch to your backup heat source straight away, check the chicks at chick level, and look for chilled birds that are slow or pasty. Warm any cold chicks gently in your hands before returning them to the brooder, and follow the same care you would give a new batch for the hours after. Record the time and length of the outage, and keep the minimum reading for the next batch.
How many bulbs does my brooder need?
It depends on the size of the ring, the height of the bulbs and the wattage. Use the manufacturer's guidance for the number of chicks each heat point covers, then check the temperature at chick level at the edges and under the heat. Two smaller points often serve a large ring better than one large bulb.

