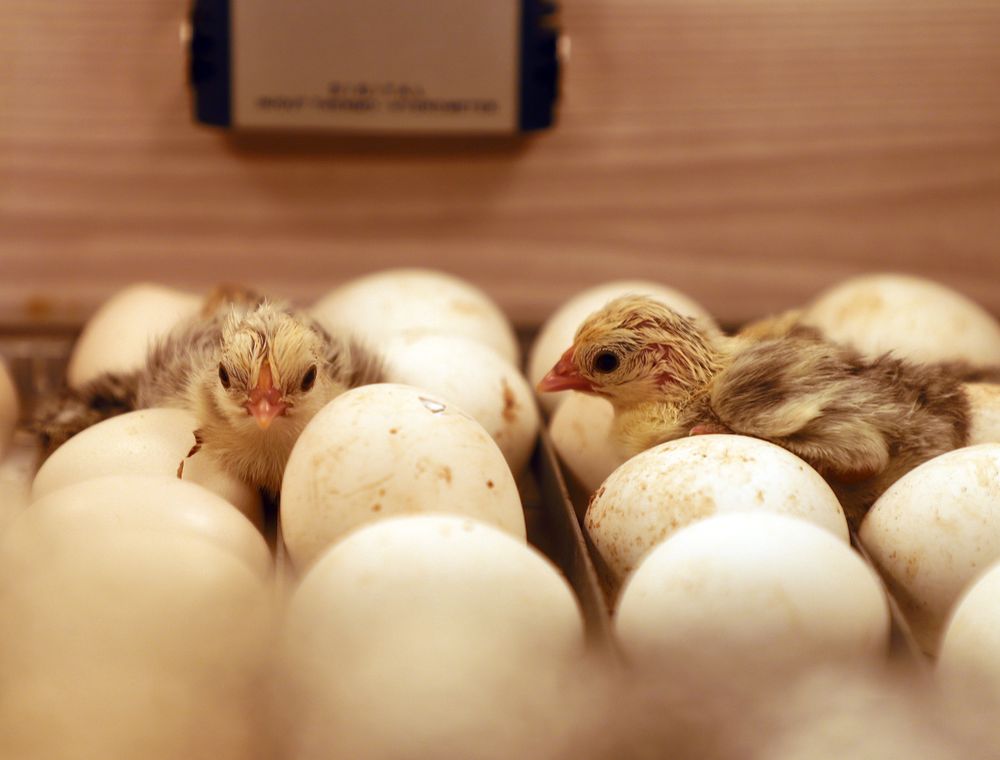
Short answer: An egg incubator holds fertile eggs at a steady temperature and humidity and turns them until hatch, but it cannot make a poor egg hatch. For beginners in Ghana, choose a machine by capacity, turning method, temperature stability and how it copes with power cuts, then run it empty for 24 to 48 hours before the first eggs go in. Buy from a seller who gives a clear written specification, after-sales support and a warranty.
Key takeaways
- An incubator controls the environment; the egg quality still decides the outcome.
- Size the machine for your target chick numbers, and leave room for a later batch.
- Look for reliable temperature control, automatic turning, a clear display and an alarm.
- Plan for power interruptions with a backup supply, because Ghana's grid can be unpredictable.
- Always run a test cycle before setting real eggs, and log every reading.
What an incubator does, and what it cannot do
New growers often expect the incubator to do the whole job. It does not. An incubator is a controlled box. Its work is to hold the eggs at the right temperature, keep the air at the right humidity, turn the eggs at regular intervals and keep the environment steady for 21 days. The embryo does the rest, but only if the egg was viable when it went in.
That division of labour is worth remembering. A machine that holds 37.5 °C perfectly will not rescue an egg that was stored too long, cracked in transit or laid by a sick hen. Equally, a good egg can fail in a machine that swings between too hot and too cold. The incubator is the environment, and the environment is what you control. Our article on why eggs don't hatch separates the causes that come from the machine from the ones that come from the egg.
For a beginner, this means you should spend your time on both sides of the process. Buy a reliable machine, and also source good eggs, as described in our guide to choosing fertile eggs.
Types of incubator: still-air, forced-air and turning method
Incubators differ in two main ways: how air moves inside the cabinet, and how the eggs are turned. Understanding both will help you ask the right questions when you buy.

A still-air incubator relies on natural convection. Warm air rises, and the heating element sits low in the cabinet. These machines are usually simpler and cheaper, but they can develop hot and cool zones, and they need careful placement and frequent checking. A forced-air incubator uses a small fan to move air around the cabinet. The temperature is more even from one side of the tray to the other, which makes it easier to keep steady. Most growers who hatch regularly prefer forced-air machines for that reason.
On the turning side, a manual machine needs you to turn each egg by hand, usually a few times a day. An automatic machine turns the trays for you on a timer. For a beginner who may forget a turn, automatic turning removes a common source of error. Some machines also offer a combined setter and hatcher design, where the same unit holds eggs for the first 18 days and then the chicks in the final three days. Others use a separate hatcher, which is more work but gives more control at the end.
- Still-air: simpler, lower cost, more hot and cold spots to manage.
- Forced-air: more even temperature, usually the better choice for steady results.
- Manual turning: cheaper, but depends entirely on your routine.
- Automatic turning: removes missed turns, which matters for beginners.
Sizing: how many eggs the machine should hold
Capacity is one of the first decisions and one of the easiest to get wrong. Buy too small and you will be limited to one batch at a time, with no room to start the next. Buy too large and you will heat a big empty cabinet for a small hatch, which uses power for nothing. A sensible rule is to size the setter to the batch you actually plan to set, plus room for growth over the first season.
Remember that a setter and a hatcher do different jobs. The setter holds the eggs from day one until about day 18, and the hatcher takes them from there to hatch. If your machine is a combined unit, the capacity you read on the box applies to the whole cycle. If you use two machines, plan the hatcher to take the same number of eggs as the setter at transfer.
| Batch plan | Typical use | What to consider |
|---|---|---|
| Small, up to about 100 eggs | Home flock, trial batches, learning the machine | Lower power use. Easy to run alone. Limited scope for growth. |
| Medium, about 100 to 300 eggs | Small commercial start, regular weekly or fortnightly setting | Needs a steady routine and a reliable power plan. Watch temperature closely. |
| Large, above about 300 eggs | Regular commercial hatching, multiple batches | Consider separate setter and hatcher, a backup power supply and a dedicated space. |
A worked example helps. Suppose you plan to hatch 200 chicks every two weeks. You will need to set roughly 240 eggs per batch to allow for infertility and early losses, as discussed in our fertile-egg guide. A setter that holds 300 eggs gives you comfortable room for that batch and a little spare capacity for a top-up. A machine that holds 150 would force you to split every batch, which doubles the handling and the chance of error.
Features that matter in Ghana's climate
Brochures list many features, and some are useful while others are marketing. The features below are the ones we would look at first, given the conditions most farms face in Ghana, from the dry harmattan to the humid rainy season.
- Stable temperature control. Ask for the stated temperature range and the swing around the set point. A machine that holds within a narrow band is far more useful than one with a higher maximum.
- Visible display. Digital readouts for temperature and humidity make it easy to see what is happening. A display you can read from across the room helps when you check at night.
- Alarm. A high and low temperature alarm gives early warning if the power or the heater fails. This is one of the most important features for beginners.
- Automatic turning. Reliable turning, with a clear schedule that you can see, takes a common task out of your hands.
- Humidity control. Some machines control humidity directly, others rely on a water tray. Either can work, but you need a way to measure the humidity, such as a separate hygrometer.
- Candling window or easy access. You will need to check eggs, so the machine should let you look without opening the whole cabinet.
- Ventilation. Vents or adjustable openings let you control carbon dioxide and moisture as the chicks grow toward hatch.
Features that are nice to have but not essential include built-in timers that sound at every turn, decorative cabinets and very large display panels. Spend your budget on temperature stability and the alarm first.
Power: planning for interruptions
Power is the factor that most often surprises growers in Ghana. An incubator must run without interruption for 21 days, and a short outage can be enough to chill or overheat a batch. Even a brief cut during the early days can change the development of the embryo, and a long cut can be fatal to the batch. This is not a reason to avoid incubation. It is a reason to plan the power supply as carefully as the machine.
There are several sensible approaches. An inverter with a battery can carry the machine through short interruptions, and it is the most common choice for small and medium operations. A generator covers longer outages but needs fuel, maintenance and a stable voltage, and it must be started promptly. Some farms use both, with the inverter bridging the gap until the generator starts. Whatever you choose, test the backup before you need it. Turn off the mains for a short period during a test run and watch what happens to the temperature.
- Know how long your backup can run the machine at full load.
- Keep the alarm working on the battery or a separate power source.
- Check the connections and the socket regularly for heat or loose wires.
- Never place the incubator where a generator exhaust can blow into the room.
For broader planning of the farm, including power and equipment costs, our article on starting a poultry farm in Ghana on a budget sets out the main cost lines.
Buying: questions and red flags before you pay
The incubator you buy will be with you for many seasons, so take the purchase seriously. Compare machines on specification, not just on price, and ask the seller for everything in writing before you pay. A written specification should include the capacity, the temperature range and control accuracy, the turning method, the power rating and the warranty period.
Ask the following questions before you commit:
- What is the warranty, and what does it cover?
- Where can I get spare parts such as heaters, fans, sensors and turning motors?
- Who will service the machine if it fails, and how quickly can they reach me?
- Can I see the machine running before I buy, or at least see a test log?
- What happens if the machine arrives damaged in transit?
Be cautious of sellers who cannot explain the controls, who refuse to give a written specification, or who ask for full payment before the machine is shown. Equally, a very low price with no service support can be expensive later. Good suppliers answer questions plainly and are happy to show how the machine works.
If you are not ready to run an incubator yet, you may find it easier to start with the egg hatching service or to buy day-old chicks directly, and come back to incubation once you have a clearer plan.
Setting up the room and the machine
Where you put the incubator matters almost as much as which model you buy. Choose a room that is clean, shaded and free of drafts. Avoid direct sun, which can drive the temperature inside the cabinet up in the afternoon, and avoid rooms next to a heat source such as a kitchen, a water heater or a generator. Keep the machine on a level, solid surface, because an uneven base can affect the turning mechanism and the airflow.
Leave space around the cabinet for air to circulate and for you to reach the controls and the vents. Keep the room closed enough to stay stable, but not so closed that the air becomes stale. A room that is comfortable for you on a warm day is often close to the right environment, though you should still rely on the machine's own readings rather than your skin.
Once the machine is in place, connect the power, switch it on and let it settle before you add anything. Set the temperature and humidity targets for the stage you plan to run, and wait for the readings to stabilise.
Need chicks for your next batch?
Send breed, number and town. We reply with price, hatch date and delivery cost in writing.
Running a test before the first eggs
Never set real eggs in a new machine until you have run it empty. A test run confirms that the temperature control, the turning, the alarm and the backup power all work together. It also shows you how the machine behaves in your room, which may differ from the showroom or the seller's yard. Plan for 24 to 48 hours of testing, with the machine running as it will during a real batch.
During the test, read the thermometer and hygrometer at the same time each hour, and write the readings down. Use a separate reference thermometer if you have one, because displays can drift. If the reading differs from the set point by more than a degree or two, adjust the calibration or ask the supplier for advice before you add eggs.
- Place the machine in its final position and switch on.
- Set the target temperature and humidity for the setter.
- Log the readings every hour for at least 24 hours.
- Confirm the turning mechanism moves the trays through its full arc.
- Test the alarm by changing the set point or disconnecting the heater briefly, if the manufacturer allows.
- Switch off the mains for a short period and confirm the backup supply keeps the alarm and the controls running.
- Only when every item passes should you add eggs.
The daily routine once eggs are in
Once the machine is running with eggs, the work becomes a routine. Most of the tasks are simple, but they must happen every day, including weekends and public holidays. The biggest risk for a beginner is a gap in the routine, when a reading is missed or a turn is forgotten and no one notices until it is too late.
A practical daily routine covers the following. Check the temperature and humidity at a fixed time each morning and evening. Confirm the turning has taken place and that the trays are sitting correctly. Top up the water tray if your machine uses one, using clean water. Look at the alarm and the power indicator. Record everything in a log that stays beside the machine.
- Morning and evening readings for temperature and humidity.
- Confirm turning, or record manual turns.
- Check the water level and refill with clean water.
- Inspect the power indicator and alarm.
- Record any changes in the log.
Keep the machine clean between batches. Wipe the cabinet with a suitable disinfectant, rinse and dry it before the next setting, and check that the vents and the fan are free of dust. A clean machine is easier to run and less likely to carry infection from one batch to the next.
Transfer at day 18 and the hatch
The final stage of the cycle is the transfer from setter to hatcher, or the change of settings in a combined machine, around day 18. At this point the embryos are fully formed and the chick begins to prepare for hatch. Changes to temperature and humidity are made at this stage, and the turning stops. Our incubation temperature and humidity chart gives the day-by-day settings and explains the lockdown step in detail.
Be careful during the transfer. Open the machine quickly, keep the eggs in their trays, and close the cabinet again. A delay of a few minutes with the door open can change the temperature enough to matter, especially in the hot season. Once the eggs are in the hatcher, keep the cabinet closed until hatch, apart from brief, planned checks.
When the chicks start to hatch, resist the urge to help. Pulling the shell can cause bleeding and death. Let the chick work its way out, and make sure the hatcher stays warm and humid until the last chick is dry. Once the chicks are out, move them to a brooder and keep them warm and dry. Our guide to setting up a brooder before the chicks arrive covers that next step.
Beginner mistakes and how to avoid them
Most first hatches teach the same lessons. The list below is what we see most often when a new grower describes a disappointing first batch, and each point has a simple correction.
- Skipping the test run. Setting eggs in an untested machine is the most common mistake. Always run the machine for at least 24 hours first.
- Trusting the seller's display alone. Check the readings with a second thermometer and a hygrometer.
- Opening the machine too often. Each opening lets heat and moisture escape. Plan your checks.
- Ignoring the power plan. One long outage can end a batch.
- Failing to log. Without a log you cannot see patterns or prove what went wrong.
If you run into a problem you cannot solve, our team is available on WhatsApp at +233 24 915 1503. You can also read our frequently asked questions or learn more about Halaal Farms, and our hatchery overview is on the hatchery page.
Questions farmers ask
Do I need a forced-air or still-air incubator?
A forced-air machine usually gives a more even temperature from one side of the tray to the other, which makes steady results easier for beginners. A still-air machine can work well if you place it carefully and check it often. If you are starting out, a forced-air machine with automatic turning and an alarm is the safer choice.
How many eggs should my first incubator hold?
Size the machine for the batch you actually plan to set, with some room to spare. Many beginners start with a unit that holds around 100 to 300 eggs, because it is manageable and still useful as the farm grows. Remember that you will need extra eggs in each batch to allow for infertility and early losses.
Why do I need to run the incubator before setting eggs?
A test run shows whether the temperature, humidity, turning and alarm work together in your own room. It also reveals hot or cold spots and lets you check the readings against a second thermometer. Running the machine for 24 to 48 hours before the first eggs goes in prevents many avoidable losses.
What should I do if the power goes off during incubation?
Use your backup supply straight away, whether that is an inverter or a generator, and check the temperature as soon as you can. Keep the machine closed to hold heat, and record the duration of the outage. The exact impact depends on the length of the cut and the stage of incubation, so log it carefully and review the batch later.
Is an automatic turner necessary for beginners?
It is not essential, but it is very helpful. Manual turning works if you are reliable, yet a missed turn is easy to overlook, especially at busy times. An automatic turner takes that task out of your routine and makes the process more consistent, which is valuable when you are still learning the machine.
What features should I check before buying an incubator?
Look at temperature stability and the stated control range, a clear display, a high and low temperature alarm, reliable automatic turning, a way to measure and control humidity, and easy access for candling. Ask about the warranty, spare parts and after-sales service before you pay.
Should I buy an incubator or use an egg hatching service?
It depends on your volume, your power supply and how much you want to learn. A small grower who wants to try incubation may prefer to start with a service and build experience. A grower with a steady supply of eggs and a reliable power plan may find that owning a machine is more practical. Our team can talk through the options on WhatsApp.


