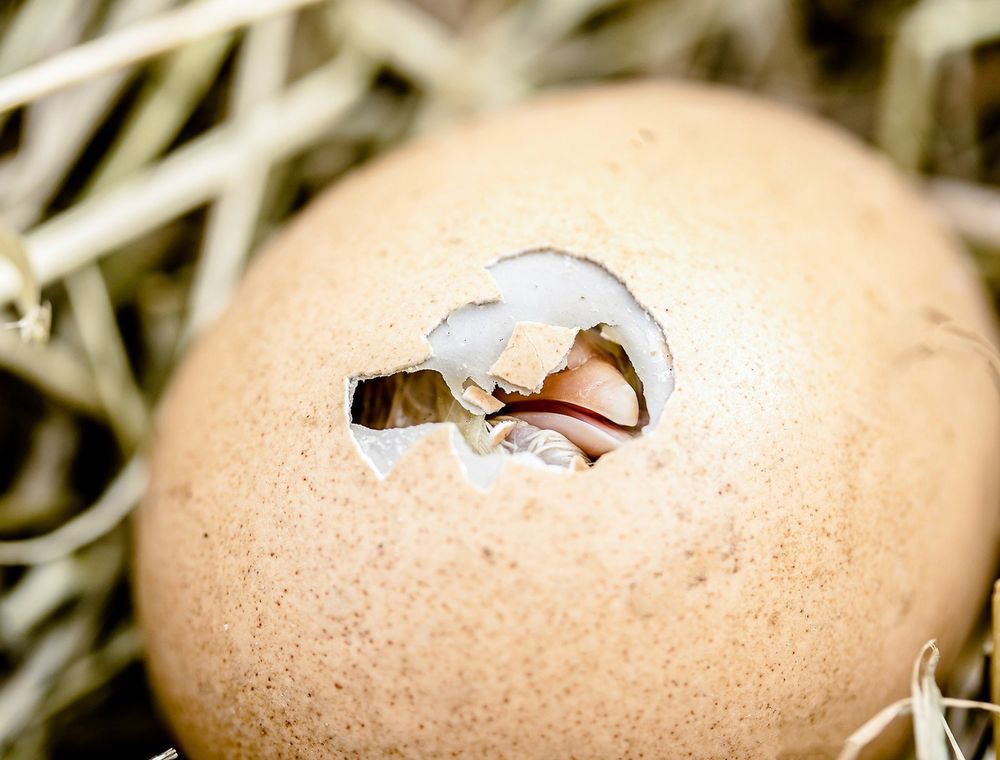
Short answer: Eggs fail to hatch for a small number of recurring reasons: poor egg quality or storage, temperature that drifts too high or too low, humidity that is too dry or too wet, missed or poor turning, rough handling, and bacterial contamination. The cause usually shows in when the embryo died and what it looked like when you opened the egg. Use a simple opening test on failed eggs, match the symptom to the table below, and change one thing at a time so the next batch tells you whether the fix worked.
Key takeaways
- The day an embryo dies, and how it looks when you open the egg, points to the likely cause.
- Egg quality and storage cause more early deaths than most growers expect.
- Temperature drift, a power cut or a faulty thermometer can cause mid-cycle losses.
- Humidity problems tend to show up as late deaths, sticky chicks or weak pipping.
- Open a sample of failed eggs every batch, record what you find, and change one variable at a time.
Reading a poor hatch before you change anything
When a batch disappoints, the first instinct is to change the machine, the temperature or the supplier. That instinct is understandable, but it often sends growers in the wrong direction. A poor hatch is a result, and results have causes. The skill is in reading the evidence before you decide what to fix.
The evidence is in the eggs. Every egg that did not produce a chick tells a story about when development stopped and what the embryo looked like at that point. Growers who open a sample of failed eggs every batch build a picture over time, and they rarely repeat the same mistake twice. Those who simply throw the eggs away learn very little, even from a poor result. For background on who we are and how we work, see our about page.
Before you open anything, look at the numbers. Compare the fertility, the early losses, the late losses and the number of live chicks against your target. A batch with many clear eggs points toward the breeding flock or the handling of eggs before the setter. A batch with many dead embryos at a particular stage points to the incubator. A batch that is fine until the last three days points to humidity and ventilation at hatch.
The opening test: how to examine failed eggs
Opening failed eggs is a skilled task, and it needs to be done carefully and hygienically. Use clean hands or disposable gloves, a clean tray, a sharp, short knife or scissors, and a bowl for the contents. Work in good light. Keep the eggs in their original order, so you can match them to the day they were set and the position they had in the tray.
- Note the egg's number and its position in the tray.
- Crack the shell carefully over the bowl and tip the contents into a clean dish.
- Look at the air cell. Note its size and whether it is torn or broken.
- Look at the yolk and the albumen. Note any unusual colour, smell or texture.
- Find the embryo. Note its size, colour and the state of its blood vessels.
- Record the findings with the day of death, using the categories in the table below.
Work quickly but not carelessly. Some eggs will have a strong smell, which is a warning sign of bacterial contamination. Wash your hands after each egg, or change gloves, so that one infected egg does not spread problems to the rest of the sample. Dispose of the contents safely, away from the poultry area.
Open a sample every batch, not only the bad ones. Ten to twenty eggs taken at random from the failed group, and a few from the hatched group for comparison, give you a clear picture without wasting the batch.
What the stage of death tells you
The stage at which an embryo dies is one of the most useful clues you have. Each stage has its own set of likely causes, because the embryo is vulnerable to different things at different times. A rough division used by many hatcheries is early, middle and late death, with a separate category for infertile eggs and for chicks that reached the pip stage.
Early deaths, in the first week, often come from the egg before it reaches the incubator. Storage, age, shell quality and parent flock health are the main suspects here. Mid-cycle deaths, roughly in the second week, more often point to temperature drift, power interruptions or missed turns. Late deaths, in the final three days, tend to point to humidity, ventilation and problems at lockdown, as well as the position of the chick. Infertile eggs point back to the flock, the male-to-female ratio, the age of the breeders and the handling of eggs before storage.
These patterns are guides, not laws. A single cause can produce deaths across several stages, and two causes can overlap. The purpose of the stage is to narrow the search, so you know where to look first.
Diagnostic table: symptom, likely cause and fix
The table below matches what you see in failed eggs with the causes most often behind it, and with a practical fix. It is written for growers using a standard chicken egg in a standard incubator. Read it alongside your log, and check the readings before you act on any single line.
| What you see | When it happens | Likely cause | Fix to try |
|---|---|---|---|
| Clear egg, no visible development | Candling, day 7 | Infertile egg; breeder ratio; eggs not fertile when laid | Check the flock ratio and breeder age; ask the seller for records |
| Blood ring with small dead embryo | Days 1 to 7 | Old eggs, poor storage, high early temperature | Shorten storage time; store cooler; check the setter in the first days |
| Dark, enlarged dead embryo, unclear blood | Days 8 to 14 | Temperature running high, or long power cut | Check the thermometer; add alarm or backup; review the log for spikes |
| Embryo dead but still fresh-looking | Days 14 to 18 | Temperature low, missed turns or poor egg quality | Confirm the heater and thermostat; restore a regular turning routine |
| Dead chick with beak in air cell, unpipped | Days 18 to 21 | Humidity too low at lockdown, or chick position | Raise hatcher humidity; check the chart and the weight loss target |
| Chick pipped, then stuck, sticky membranes | Day 19 to 21 | Humidity too low; shell membrane dried | Add water earlier; keep the hatcher closed; avoid opening during hatch |
| Chick hatched but wet or weak, slow to dry | Hatch day | High humidity, poor ventilation, or long hatch window | Reduce water at hatch; improve airflow; plan removal once dry |
| Strong smell, dark or cloudy contents | Any stage | Bacterial contamination of the egg | Handle with clean hands; clean machine; review storage; ask a vet |
| Cracked or leaking eggs in the tray | Any stage | Rough handling, transport damage, dirty machine | Remove on arrival; cushion trays; avoid knocking the setter |
Use the table to form a hypothesis, not a verdict. If the symptom matches two causes, check both. If it matches none, record the findings in detail and look more closely at the log before you make a change.
Egg quality and storage: the causes that start before the setter
Many hatch problems begin before the eggs reach the incubator. An egg that was stored too long, kept in heat, washed, cracked in transit or laid by a young or poorly nourished hen can carry a weakness that no machine can fix. This is why the early stages of a poor hatch so often point back to the eggs themselves.
The checks that matter most are the storage age, the storage temperature and humidity, the shell condition, and the health and age of the parent flock. Our guides to choosing fertile eggs and storing fertile eggs set out what to look for at each step. If your early deaths are high and your log shows the machine ran steadily, the eggs are the first place to investigate.
- Ask for the collection date, and count the days to setting.
- Check that the flock is vaccinated and healthy, with a record you can see.
- Look for flock nutrition problems, such as a recent change of feed or a shortage of key nutrients.
- Discuss persistent problems with your vet, who can review the flock more closely.
Temperature problems: too hot, too cold, or drifting
Temperature problems are the most common cause of mid-cycle deaths, and they are often invisible until you read the log. A thermostat that sticks, a sensor that has moved, a heater that has failed partway through the cycle, or a power cut that chilled the cabinet can all create losses that look like something else. The fact that the display showed the correct reading at the time you checked it does not rule out the problem.
When temperature is too high, the embryo develops too fast and often dies with its blood vessels poorly developed. When it is too low, development slows, and the embryo may live for a while and then die weak. Both can happen in the same batch if the machine cycles badly. The fix starts with a reference thermometer placed at egg height, and a log that shows the full pattern of readings, including short spikes that you might not see at a single check.
Power interruptions deserve their own attention. A short cut can be harmless, but a long one during the early or middle stages can change the outcome. Check your log for any outage, and compare its timing with the day of death.
Humidity problems: too dry, too wet, or unbalanced
Humidity problems show their hand most clearly at the end of the cycle. Eggs that were developing well can still fail at lockdown if the air has been too dry, because the membranes shrink and the chick struggles to free itself. Too much humidity can cause a different problem, with a chick that is soft and wet, slow to dry, and weak at the point of hatch.
The weight loss check described in our incubation chart is a useful test. If eggs have lost too little weight by lockdown, the air has been too humid during the setter stage. If they have lost too much, the air has been too dry. Adjust gradually, and weigh again before you make another change. Check your hygrometer's accuracy as well, because a faulty hygrometer can lead you to correct the wrong thing. The weight loss targets we use are set out in our temperature and humidity chart.
Ventilation is the partner of humidity. A machine with its vents closed can hold moisture and carbon dioxide in ways that disturb the late stages, while a machine with its vents too open can dry the eggs quickly. Set the vents according to the stage and the season, and treat them as part of the humidity plan.
Turning and position: when the chick cannot move into place
Turning keeps the embryo from sticking to the shell membrane during the early stages. Once the chick is larger, its position matters even more. A chick that is in the wrong position at the end of incubation may be unable to reach the air cell and pip correctly, and it may die in the shell even though it was developing well up to that point.
Missed turns, a turner that stops, or a tray that is not level can all contribute to poor position. Check that the turning mechanism runs through its full arc, and that the trays sit flat. Confirm the turning stops at lockdown, because turning after that point is itself a cause of problems. If your machine is manual, make sure the routine is written down and followed, including on weekends and holidays.
Need chicks for your next batch?
Send breed, number and town. We reply with price, hatch date and delivery cost in writing.
Handling and hygiene: small habits with large effects
Handling affects the hatch in two ways. Physical damage, such as cracks, jolts and rough setting, can kill an embryo directly. Bacterial contamination, from dirty hands, dirty trays or a dirty machine, can kill it more slowly and produce the strong smells that many growers notice when they open failed eggs.
Hygiene is largely a matter of routine. Clean and dry the machine between batches. Keep trays and tools for hatching separate from those used for other poultry work. Wash hands before handling eggs, and avoid touching the inside of the cabinet with dirty gloves. Keep the storage and setting rooms free of feed dust and droppings, since these can carry bacteria onto the shell.
- Clean and disinfect the setter and hatcher between batches, and rinse and dry fully.
- Use clean trays and keep them away from the floor.
- Do not wash hatching eggs before setting.
- Keep a separate set of tools for the hatchery area.
If you notice persistent smells or repeated losses from the same cause, do not assume the problem will pass. Speak to your vet about the flock and the setting environment, and follow the advice you receive. Our hatchery page describes how we run our own hatchery, if you want to compare routines.
Parent flock factors you can influence and those you cannot
Some causes of poor hatch lie in the flock itself. Breeder age, the male-to-female ratio, nutrition, disease status and vaccination history all affect fertility and embryo quality. As a buyer you cannot control these directly, but you can choose sources that manage them well, and you can ask the right questions before you buy.
A flock that is very young or very old often produces eggs with lower fertility or weaker embryos. An imbalance in the ratio of males to females can leave many eggs infertile. A flock that has had recent disease, or that has been under stress from a feed change or a heat wave, can produce eggs with shell or albumen problems. Ask the seller for these details, and record the answers with each batch so you can compare suppliers over time. If you are deciding between sources, our imported versus local comparison sets out the trade-offs.
Where you suspect a flock problem, speak to your vet. A vet can look at the flock's health, advise on vaccinations and suggest what to check, and can help you separate a flock issue from an incubation one.
Fix one thing at a time and test the result
The most common mistake after a poor hatch is changing several things at once. A grower lowers the temperature, adds water, buys new eggs and moves the machine, all in the same week. If the next batch improves, nobody knows which change made the difference, and the same problem returns later. A simple discipline avoids this. Change one variable per batch, record the change in the log, and compare the results.
Start with the cause that the evidence points to most strongly. For the settings each stage should run at, the 21-day chart is the reference to keep beside the machine. If the early deaths are high and the machine log is clean, begin with the eggs. If the mid-cycle deaths are high and the log shows spikes, begin with the temperature. If the late deaths are high and the chicks are sticky, begin with the humidity. Once you have made one change and recorded the outcome, decide whether the next change is needed.
- Open a sample of failed eggs and record the stage of death for each.
- Match the findings to the diagnostic table and choose the most likely cause.
- Make one change, and write it in the log with the date and batch number.
- Run the next batch and compare the results at the same stages.
- Keep the change if it helped, or revert it if it did not, and move to the next suspect.
When to get help, and what to send
Some problems are beyond what a log and a table can solve. If the losses remain high after several careful batches, or if you see symptoms that suggest disease, bring in your vet. Take a sample of failed eggs and the log, and describe what you have seen at each stage. A clear record makes the consultation faster and more useful.
If you are buying eggs or chicks from us, we are happy to talk through what you have found. Call or message us on WhatsApp at +233 24 915 1503, and include the batch details, the storage age, the day of death and the readings from your log. For a general set of answers, our frequently asked questions cover many of the common points, and the beginner's incubator guide explains how to set up the machine in the first place.
Farm visits are available by appointment for growers who want to see the setting routine in person. If you would rather hand over the hatching step, the egg hatching service page explains how that works, and the order form is the place to start if you want to talk about eggs or chicks for your next batch.
Questions farmers ask
Why do eggs die at day 18 or later?
Late deaths usually point to humidity, ventilation or positioning. If the air has been too dry, the membranes can shrink and the chick struggles to free itself. If the chick is in the wrong position, it may not reach the air cell. Check your humidity log and the weight loss of your marked eggs, then review the lockdown steps.
What does a blood ring in an egg mean?
A blood ring at the early stage, around day 1 to 7, usually means the embryo started to develop and then stopped. Common causes include old eggs, poor storage conditions and early temperature problems. It is a sign to check storage age and the setter's first few days rather than a sign of a single bad egg.
Can a clear egg be saved?
No. A clear egg at candling shows no visible development, which usually means it was not fertile when laid. Remove it from the setter so it does not take up space or heat. Then look at the flock ratio, the breeder age and the handling of the eggs before storage to see whether the cause can be corrected.
Why do chicks sometimes get stuck while pipping?
A chick can get stuck when the shell membrane has dried, usually because humidity was too low at the end of incubation. It can also happen when the chick is not in the correct position. Opening the machine to help can cause bleeding, so resist the urge. Review the humidity plan for the next batch and add water earlier if needed.
What should I do if many eggs smell bad?
A strong smell, particularly a rotten or sulphurous one, suggests bacterial contamination or a broken egg that leaked inside. Remove the affected eggs carefully, clean the machine thoroughly, review how eggs were handled and stored, and speak to your vet about the flock and the setting environment.
How do I know if the problem is the eggs or the incubator?
Look at when the embryos die. Early deaths in the first week point more often to the eggs. Mid-cycle deaths with spikes in the log point more often to the incubator. Late deaths, with dry membranes or sticky chicks, point to humidity and ventilation. Open a sample of failed eggs every batch to build this picture.
How many failed eggs should I open to find the cause?
A sample of 10 to 20 failed eggs taken at random is usually enough to see a pattern, together with a few hatched eggs for comparison. Record each egg's position, the stage of death and what you saw. A larger sample is useful when the losses are high, but the record matters more than the number.


