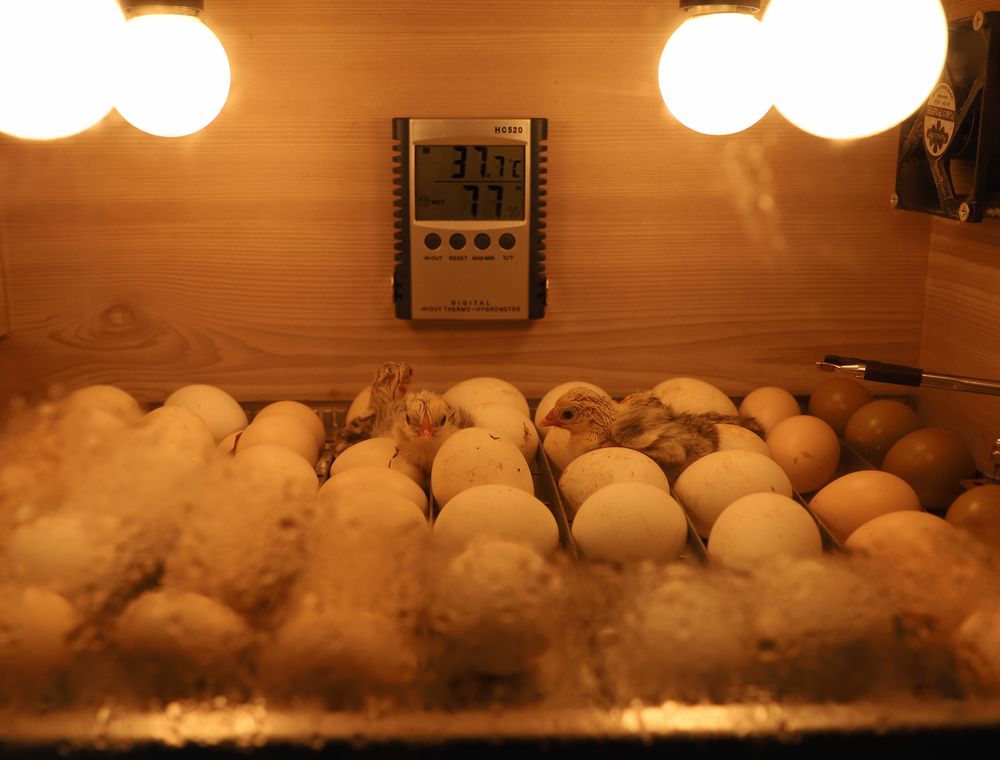
Short answer: Egg candling means shining a bright light through an egg to see what is happening inside. Done on a fixed schedule, around day 7, day 10 to 12 and day 18 of a 21-day incubation, it separates fertile eggs from clear ones, shows early embryo death, and tells you when to move eggs to the hatcher. Keep each check short, in a dark room, and write down what you see.
Key takeaways
- Candle at fixed points: around day 7, day 10 to 12, and day 18 before transfer.
- A clear egg at day 7 is infertile or died very early, so remove it.
- Live embryos show a network of blood vessels, a growing shadow and movement.
- Keep handling time short so the eggs do not cool and lose their heat.
- Count clears, early deaths and late deaths separately at every check.
What candling shows you and why it matters
Candling means placing a strong light against the shell of an egg in a dark room. The light passes through the shell and the membranes, so you can see what is inside without breaking the egg. For a farmer running an incubator, that view answers four questions: is the egg fertile, is the embryo developing, has it died, and is it ready to move on to the hatcher?
At our hatchery in Opeikuma, Kasoa (about us), we treat candling as the cheapest diagnostic tool we have. A chick that fails to hatch leaves a story behind, and the candling record is where that story starts. If you are buying eggs to set, the quality of the source matters as much as the setter. Our fertile eggs page explains what to expect from the source, and the guide to choosing fertile eggs covers what to look for before the eggs go into the machine.
Candling does not make a bad batch good. It shows you what happened, so you can change the next batch. That is why the record matters as much as the light.
Equipment and set-up
You do not need expensive equipment to candle well. You need a dark space, a steady light and a clean surface. Here is a practical set-up for a small or medium setter.
- A dedicated candler, or a small box with a round hole and an LED torch inside. LEDs run cooler than old bulbs, so they warm the eggs less.
- A dark room or a corner that can be shaded from daylight. Working in full sun makes the veins and the embryo hard to see.
- A clean tray lined with soft paper or foam, so eggs do not roll or crack.
- A soft pencil for marking eggs. Ink can run if the shell is damp.
- A record sheet with columns for the date, the day of incubation, the number of eggs checked, clears, early deaths and live embryos.
- Clean, dry hands, and a bowl of warm water nearby for emergencies.
If you are still choosing a setter, our incubator guide for beginners compares the common machine sizes. Test the candler before you start. Hold a clean, known-fertile egg up to it, and make sure you can see the air cell and the yolk shadow clearly. If the light is too hot to hold against the shell for a few seconds, it is too hot for the egg.
How to candle an egg, step by step
The aim is to see every egg in a few minutes, then put the live ones back before they cool. Work in small batches, not the whole setter at once.
- Switch off the room lights and close the door so the candling area is as dark as you can make it.
- Take out one tray at a time. Keep the rest of the eggs covered in the setter.
- Hold each egg with the blunt end, where the air cell sits, toward the top of the candler.
- Turn the egg slowly so you see the whole contents. Note whether the egg is clear, shows veins, has a dark spot, or shows movement.
- Mark the eggs with your pencil: a tick for live, a cross for clear, and a circle for an early death.
- Return live eggs to the setter in the same orientation, so the turning schedule continues without a jump.
- Write the counts on your record sheet before you start the next tray.
A tray of 30 eggs should take a few minutes at most. If you find yourself holding eggs under the light for much longer, stop and check the light. Long handling is the most common way a good egg is lost during a check.
Day 7: fertile or clear?
Around day 7 is the first useful check. A fertile, developing egg shows a network of blood vessels spreading across the yolk, with a darker embryo spot at its centre. The vessels look a little like a spider or a tree, and they are your first proof that the embryo is alive and growing.
Some eggs will look clear. A clear egg has no vessels and no embryo spot, which means it was either never fertile or died so early that nothing shows. Remove clear eggs from the setter. They cannot hatch, and leaving them in place takes up space and can, in time, spoil the eggs around them.
Watch for a blood ring. This is a ring of blood around a small dark spot, and it marks an embryo that stopped developing early, often in the first few days. Blood rings should also come out. If you find many blood rings in one batch, do not blame the eggs alone. Look at the setter temperature for the first few days, the turning routine, and how long the eggs were stored before they were set.
Day 10 to 12: watch the embryo grow
The second check, around day 10 to 12, is where a healthy embryo becomes obvious. The shadow grows darker and fills more of the egg. You may see the eye spots and the early shape of the head, and the vessels around the shell edge become more extensive. Because the change is large over a few days, the second check is a good moment to compare the batch with your day 7 record.
Eggs that have not changed much since day 7 deserve a closer look. They may have stopped developing, or the embryo may be weak. Mark them on the tray and check them again at day 18. Do not remove them yet unless they are clearly dead, because a slow embryo can still hatch. Eggs that have clearly stopped, with a dark or cloudy look and no visible vessels, should go.
Use this check to think about your setter as a whole. A uniform batch suggests stable heat and turning. A batch with mixed results, some strong and some weak in the same tray, often points to uneven heat, a tray in a cooler corner, or eggs that were of different ages when they went in.
A day-by-day reference table
Use this table as a quick reference while you candle. The actions are the usual responses on a small farm, and your incubator manual may give more detail for your machine.
| Day | What a healthy embryo shows | Common problem | Action |
|---|---|---|---|
| Day 7 | Network of blood vessels and a darker embryo spot | Clear egg, or a blood ring | Remove clears and blood rings, and record the count |
| Day 10 to 12 | Darker embryo, larger shadow, eye spots visible | Little change since day 7 | Mark the eggs, check setter temperature and turning |
| Day 14 (optional) | Embryo fills more of the egg, air cell visible | Dark, cloudy egg with no shadow | Remove dead eggs, review humidity and ventilation |
| Day 18 | Enlarged air cell, strong shadow, movement when turned | Silent, cloudy or foul-smelling egg | Remove dead and bad eggs, move live eggs to the hatcher |
| Day 19 to 21 | Pip marks, then the chick breaks the shell | No pip by the end of day 21 | Leave a short time, then remove and record |
A foul smell is a clear sign that an egg has burst inside. Remove it at once, clean the tray, and check the rest of the batch for leaks. Do not open the shell to see what went wrong unless you are sure it is safe to handle.
Day 18: candle, then transfer to the hatcher
Day 18 is the most important check of the cycle. In the common 18-day setter and hatcher routine, eggs stay in the setter at about 37.5 °C until day 18, then move to the hatcher for the final three days. Once they are in the hatcher, you must not turn them again, and the machine should stay closed as much as possible.
Candle every egg before it leaves the setter. Look for the enlarged air cell, the strong embryo shadow and, if you move the egg slightly, the movement inside. Live eggs go to the hatcher. Dead eggs, silent eggs and foul-smelling eggs come out. This is also the moment to count the dead eggs and compare the count with your day 7 and day 10 records.
Set the hatcher conditions according to your machine's manual, and raise humidity as the manual directs for hatching. Keep the hatcher door shut while the eggs are hatching. Every time you open it, you let out warmth and moisture that the chicks need. If you would rather leave the hatching stage to a specialist, our egg hatching service handles it from the setter onward.
Need chicks for your next batch?
Send breed, number and town. We reply with price, hatch date and delivery cost in writing.
What your candling results tell you
A single bad check tells you little. Patterns across several batches tell you a great deal. Look at your records each time and ask which kind of failure is recurring.
- Many clears from the start. The source flock, the ratio of males to females, or the age of the eggs when set may be the cause. Review the source and storage. Our guide to storing fertile eggs covers the storage side.
- Many blood rings around day 3 to 7. Look for heat spikes early in incubation, and for eggs that were overheated during handling.
- Many deaths around day 14 to 18. Check humidity and ventilation. Our incubation temperature and humidity guide explains the balance.
- Many chicks dying in the shell after the pip. Look at the hatcher routine: humidity, opening frequency and the time the eggs were moved.
If you cannot find the cause, do not change everything at once. Change one setting, record the result over one more batch, and then decide. Our guide on why eggs do not hatch works through the most common causes in order. When you are ready for the next batch, ask us about hatching eggs on WhatsApp at +233 24 915 1503, or use the order form on our site.
Ghana conditions: harmattan, heat and power cuts
Local conditions change how candling works. In the harmattan, the air is dry and dusty. Eggs lose moisture faster, the air cell grows more quickly, and an egg that looked healthy at day 14 can look thin and light by day 18. In the rainy season, humidity rises, and shells pick up damp and mould if the trays sit open for too long. Dry the trays and keep them clean between uses.
Power cuts are the hardest test. When the setter loses power, the eggs cool, and a candling session during an outage can cool them further. Plan ahead. Have a battery LED torch for candling, and keep a second light source ready so you can work quickly. If the power is off for a long time, follow your incubator manual for the steps to take, and record the outage in your notes so you can explain any change in the next check.
Heat matters too. Candle in the cool part of the day, early in the morning or later in the evening, and never in a room that is already hot from the sun. A warm room will not hurt the eggs in a few minutes, but it makes it harder to keep the eggs at a steady temperature while you work.
Common candling mistakes
- Candling for too long. A few minutes per tray is enough. Long handling cools the eggs and tempts you to keep turning them under the light.
- Using a very hot bulb. Old incandescent bulbs can warm the shell. An LED is safer for the eggs and easier on your hands.
- Candling every day. Frequent handling disturbs the eggs and adds risk. Stick to the planned checks unless something looks wrong.
- Leaving the eggs out. Batch the work so the eggs are out of the setter for as short a time as possible.
- Forgetting the orientation. Put eggs back the way they were, so the turning schedule is not disturbed.
- Not marking the eggs. An unmarked tray at day 18 leaves you guessing about the day 7 results.
- Not writing it down. Without the record, every batch looks like a fresh start.
Keep a candling record that tells a story
A candling record needs only a few columns, but they must be filled in every time. Write the date of each check, the day of incubation, the number of eggs checked, the number of clears, the number of early deaths, the number of live embryos, and a short note on anything unusual, such as a power cut or a tray moved to a different corner.
At the end of each batch, add up the totals and compare the hatch rate with the number of live embryos you saw at day 18. A large gap between the two points to a problem during transfer or hatching, not during incubation. That single comparison, made every batch, is the most useful thing you can do to improve your results over time.
Questions farmers ask
What is egg candling?
Egg candling is the practice of shining a strong light through the shell of an egg in a dark room. The light shows the air cell, the yolk shadow, blood vessels and, later, the developing chick. Farmers use it to separate fertile eggs from clear ones, to remove early deaths, and to decide when eggs should move from the setter to the hatcher.
When is the best day to candle eggs?
Use three checks in a standard 21-day cycle: around day 7 for fertility, around day 10 to 12 for a second look at development, and day 18 before transfer to the hatcher. An optional check at day 14 can help you spot problems earlier in a large batch. Keep the same schedule every time so your records can be compared.
Can I candle eggs with a phone torch?
A phone torch can give a rough check in a very dark room, but it is hard to hold steady and the light is often uneven. A purpose-built candler or a small box with an LED torch inside gives a steadier, cooler and more even beam. Whatever you use, test it on a known egg first so you know what a healthy egg looks like under it.
What does a clear egg mean at day 7?
A clear egg at day 7 shows no blood vessels and no embryo spot. It was either never fertile or the embryo died so early that nothing is visible. Either way it cannot hatch. Remove it from the setter, record it as a clear, and look at the batch as a whole to see whether clears are unusually high.
What does a blood ring mean?
A blood ring is a ring of blood around a small dark spot, and it means the embryo stopped developing early. It usually appears in the first few days. Remove the egg. If many eggs in one batch show blood rings, check the setter temperature in the early days, the turning routine and the storage history of the eggs.
Does candling harm the embryo?
Brief, careful candling does not harm a healthy embryo. The risk comes from long handling, a hot light, rough movement and leaving the eggs out of the setter for too long. Work in small batches, keep the light cool and return the eggs quickly. A tray should be checked in a few minutes.
What should I do if an egg shows no movement at day 18?
Lack of movement alone is not conclusive, because a healthy embryo can be still for a moment. Look for other signs: a clear shadow, a strong air cell, and a normal shape. If the egg is cloudy, silent or has no shadow, it is probably dead. Remove it at transfer, and check it for smell. A foul smell confirms that the egg should be removed.
How many eggs should I candle at once?
Work with one tray at a time, so the rest of the eggs stay warm and turned in the setter. For a small setter, that may be a single tray of 30 eggs. For larger machines, plan the checks so the work finishes in a few minutes, and keep the lid closed between trays. Speed matters more than the size of the batch.


