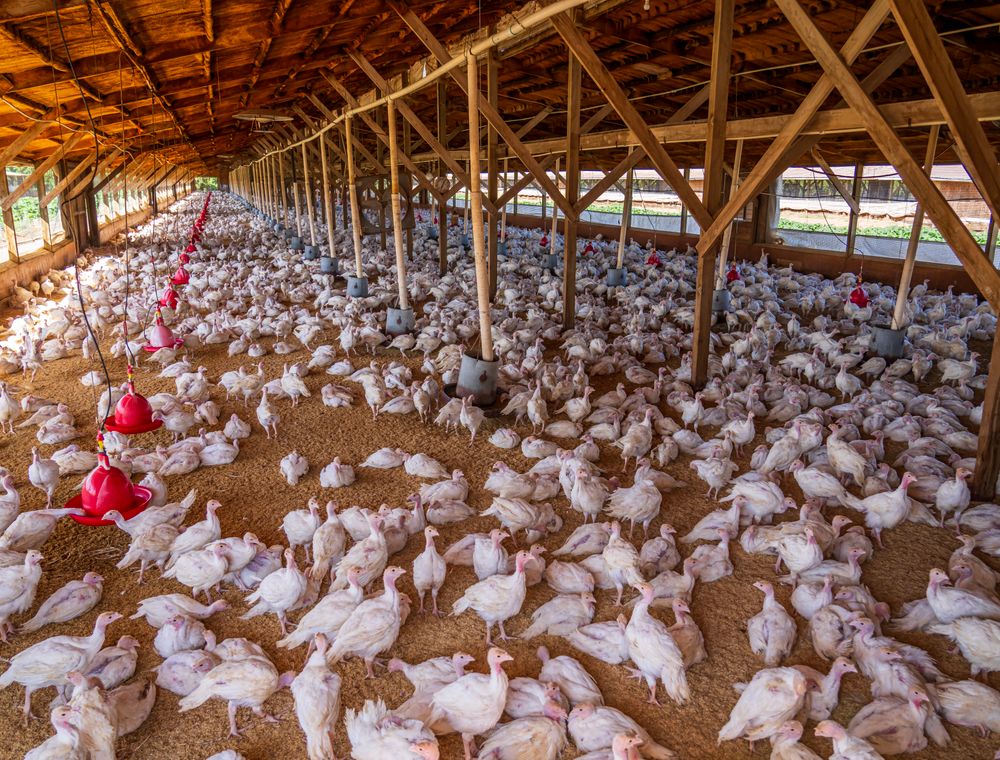
Short answer: Plan brooder space by the week, not by the box: about 20 chicks per square metre in week one, falling to roughly 6 by week six, with enough feeders and drinkers to match. For 100 chicks that means about 5 square metres in week one and about 17 by week six. Open the ring a panel at a time as the brood grows, and treat a crowded corner as the first sign you are behind.
Key takeaways
- Work out the floor you need for each week from the number of chicks, not from the room you happen to have.
- Plan about 20 chicks per square metre in week one, falling steadily toward 6 by week six as the birds grow.
- Count feeders and drinkers to the brood, because a space that looks big enough can still leave birds without water.
- Open the ring in small steps on a written schedule, and never all in one day.
- Split a large brood into two smaller rings rather than squeezing one ring past its week's target.
Start with a metre tape, not a catalogue
Ask a new farmer how many chicks their brooder holds and you will usually get a number from the seller's brochure. Ask how much floor they have, and the answer is often a guess. The first job in planning a brood is the tape measure, and the second job is the arithmetic, because the number of chicks you can keep in a space changes every week.
Measure the inside of the ring or pen at the floor. Measure the usable area, not the total area: take off the strip where the heat is too strong to sit in, the corner the feeder blocks, and any patch the chicks cannot reach comfortably. Write the figure down in square metres, and keep the same figure in the notebook for every batch. Our hatchery background is on the about page if you want to know where the chicks come from.
Once you know the floor, the rest is division. A square metre of floor at 20 chicks per square metre holds 20 chicks in week one. The same square metre holds far fewer by week six, because the birds are much bigger, and that is where most crowded brooders go wrong.
Why a chick needs more room than its size suggests
A day-old chick looks small enough to fit anywhere, and that is exactly why farmers pack them in. But a chick's need for room is set by its appetite, its waste and its heat, not by how little it weighs. A brood of 100 chicks eats, drinks and drops litter as a single group, and the floor has to carry all of it.
Density matters most in the first two weeks, because that is when the chicks are most fragile and the litter is easiest to spoil. Crowding in week one leads to chicks that huddle, which leads to cold corners, which leads to birds that do not reach the feeder. Crowding in week three leads to wet litter, which leads to a sharper smell by week four.
Density also rises faster than most people expect. A brood that looks loose at day seven can be tight by day twenty-one, even though the number of chicks has not changed. The birds have grown into the floor. That is why the plan has to be written by the week.
The planning table: chicks per square metre by week
These are planning figures for a broiler or dual-purpose brood in a ring or a simple house. They are not a limit to aim for, and they are not a substitute for the breed guide or your vet's advice. Use them as a starting point and adjust if the litter, the weather or the birds tell you to.
| Week | Chicks per square metre (planning) | Floor needed for 100 chicks | Feeder pans, about 40 cm | Drinkers for 100 chicks |
|---|---|---|---|---|
| Week 1 | About 20 | 5.0 square metres | 2 | 2 bell drinkers, or equivalent |
| Week 2 | About 15 | 6.7 square metres | 2 | 2 bell drinkers |
| Week 3 | About 12 | 8.3 square metres | 3 | 3 bell drinkers |
| Week 4 | About 10 | 10.0 square metres | 3 | 3 bell drinkers, or nipples on a line |
| Week 5 | About 8 | 12.5 square metres | 4 | 4 drinkers, or equivalent |
| Week 6 | About 6 | 16.7 square metres | 4 | 4 drinkers, or equivalent |
Notice what the table does not say. It does not hold a brood in the same space from day one to the sale. Each row asks for more floor, and the question you should be asking every week is whether your floor has grown to meet it. Drinker and feeder numbers are planning counts, and your equipment supplier's manual should always win where they differ. The finishing weeks, when birds are close to sale weight, are covered in our broiler stocking density guide.
Working out the floor for 100 chicks, step by step
Take 100 chicks and the table above. In week one you need 100 divided by 20, which is 5 square metres. A ring that is 2.5 metres across holds about 4.9 square metres of floor, so it is close, and you will want it just slightly bigger, or you will want to measure the usable floor again.
In week three the same 100 chicks need 100 divided by 12, which is about 8.3 square metres. The ring that worked in week one is now too small, and the brood has to be given more floor before the week begins. Do not wait for the crowding to tell you. The move should happen on the day the week starts, while the birds are still easy to shift.
If your brood is a broiler batch, our broiler day-old chicks are the usual choice for this table. By week six the brood needs about 16.7 square metres. For most farms that means the ring has been opened into a room or a larger house. The lesson is that the arithmetic is simple, and the practical work is in making the space grow on schedule.

Feeders and drinkers: the count that matters more than the floor
A farmer can have enough floor and still lose birds, because the chicks cannot reach the feed or the water. Feeders and drinkers have to be counted to the brood, and they have to be placed so that the birds at the far edge are not walking through the crowd to eat.
In the first week, give the brood enough feeders that every chick can eat at once without pushing. Put the feed in shallow pans that the chicks can reach without climbing. The pans should be cleaned and refilled at least once a day, and any feed that has been scratched out of the pan and into the litter should be removed.
Drinkers follow the same logic. Bell drinkers and nipple lines each have their own capacity, and the equipment supplier will tell you what one drinker can serve. Place the drinkers at the same height as the chicks' backs, and move them outward as the brood grows so the water stays easy to reach.
Check the water every morning and every evening. In a crowded brood the first drinker to run dry is always the one at the edge, and the chicks at that edge are the ones that fall behind.
Opening the ring in steps, on a written schedule
The ring is a tool, not a home. Its job is to hold heat and keep the brood together in the first weeks, and it should open as the brood needs more floor. The question is how fast.
Open one panel at a time, and only on the day the week's target says you need it. Lower or move one panel, watch the brood for a night, and then move the next. Chicks given a sudden extra two square metres sometimes wander into it and get chilled, so make the new floor warm before the chicks reach it.
Write the schedule on the wall of the brooder, with the date for each panel. Our brooder ring set-up guide explains how to size the first ring, and the schedule here picks up where that guide leaves off. If you already have a ring, measure it against the table this week and see how far behind you are. Open it only when the heat can follow the new floor, and check our brooder temperature chart before you move a panel. Once the ring is fully open, the move out of heat is covered in our weaning guide.
When two small rings beat one large one
A large brood is not always best kept together. Two rings of 50 are often easier to manage than one ring of 100, because you can heat and watch each one more closely, and a problem in one ring does not spread to the whole brood. The cost is the second heat source, the second feeder set and the second drinker set.
Split the brood when your floor cannot grow at the rate the table asks, or when your heat can only warm a small area evenly. Keep the two rings as similar as you can, with the same breed, the same feed and the same hatch date. Mixing batches with different start dates makes the weaning and the sale much harder to plan.
If you buy a mixed order, such as a Kuroiler and a Sasso box, keep them in separate rings. Their growth rates differ, and a dual-purpose bird and a fast broiler will not fill a shared floor in the same way. Our Kuroiler and Noiler chicks and Sasso chicks pages describe the growth patterns you should plan around.
Need chicks for your next batch?
Send breed, number and town. We reply with price, hatch date and delivery cost in writing.
Cockerels, mixed sexes and uneven birds
Some farmers buy cockerels or a mixed flock and expect the birds to grow evenly on the same floor. They do not. Male birds of many breeds grow faster than females, and a few birds in every batch will be visibly bigger by week three. The floor has to suit the largest birds, not the average, because the big ones take the best places at the feeder.
If you are raising cockerels for the table, plan their floor on their likely weight rather than their age. Our cockerel day-old chicks are a practical choice for that job, and a separate ring for them is usually worth the cost of the extra feeder and drinker. Keep the sexes apart as soon as you can tell them apart, and check the space every week against the bigger birds. A second ring costs less than most farmers expect, and our current starting prices show how small the chick cost is beside a lost bird.
Uneven birds are also a sign the brood is too tight. A few small chicks at the edge that do not grow are often the ones that could not reach the feed in a crowd. Count them and move them to a corner of their own before the others push them further back.
Signs the brood is too tight for its week
- Chicks piling into the corners in the warm zone, or standing on each other at night.
- Litter that stays wet for more than a day after the morning clean-up.
- A sharp ammonia smell by the middle of the day, not just first thing in the morning.
- Birds at the edge of the ring that are visibly smaller or hunched when the rest look fine.
- Feeders emptied in minutes, with the chicks at the back getting nothing.
- Drinkers running dry by the afternoon, or birds crowding round one drinker.
If you see two or more of these, the brood is behind on space, and the fix is to open the ring or split the brood that day. Waiting for the next scheduled step is the usual mistake, and it costs birds in the week when they can least afford it.
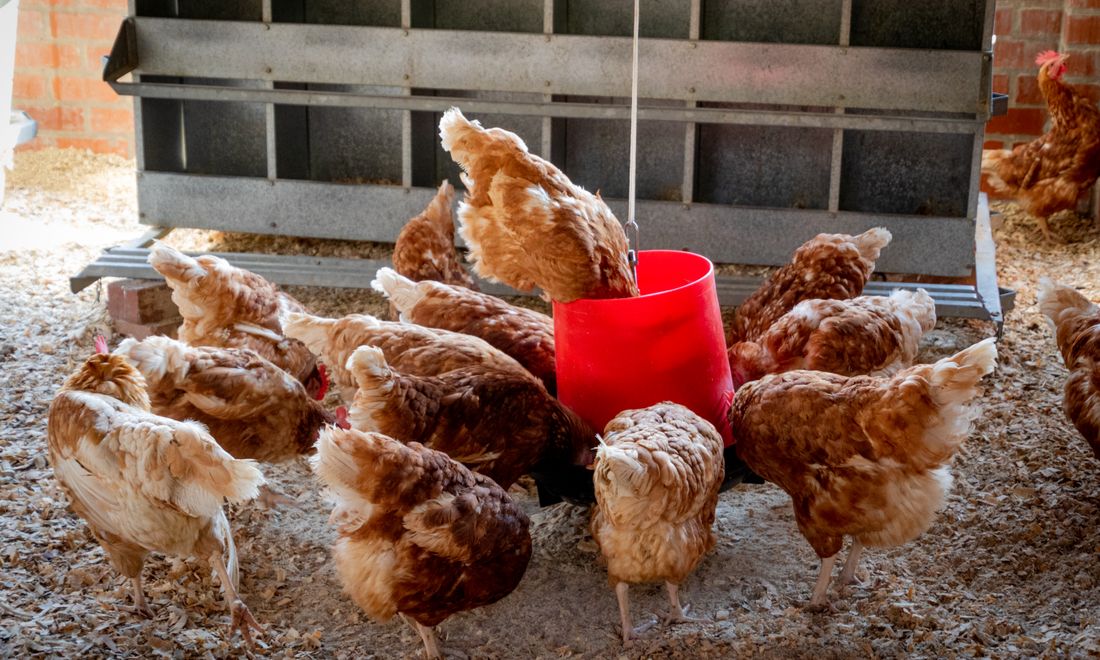
Litter and ammonia as the density gauge you can smell
Your nose is a useful density gauge. In the first week the litter should be dry, lightly scented and easy to scratch. By week two, if the brood is tight, the litter starts to clump under the drinkers and the smell gets stronger in the warm zone. By week four, a crowded brood can make the air sting the eyes of a person who walks in from outside.
When that happens, act on the litter and the space together. Pull out the wet clumps and replace them with dry litter, move the drinkers a little so the spill stops landing in the same place, and give the brood more floor. Clean litter alone will not fix a crowded house, and more space alone will not fix a damp floor.
Ventilation matters here too. A brood on the right floor area with poor air movement can still smell bad. Keep a high vent open and check the air at chick height at the end of each day.
A week-by-week checklist for the brooder
- Week one: floor measured in square metres, about 20 chicks per square metre, two feeder pans and two drinkers per 100 chicks.
- Week two: floor checked against about 15 per square metre, litter dry under the drinkers, the first panel ready to open.
- Week three: floor at about 12 per square metre, feeders and drinkers increased, the brood split if the floor is short.
- Week four: floor at about 10 per square metre, ammonia checked at chick height, the ring fully opened or the brood moved.
- Week five: floor at about 8 per square metre, feed and water counted against the birds, the heat plan confirmed.
- Week six: floor at about 6 per square metre, the house ready for the final stage and the sale or grow-out plan confirmed.
Pin the list beside the schedule for the ring. If you want to talk through a particular house, message us on WhatsApp at +233 24 915 1503, or place the batch through the order form. We can also check the batch size against the space you have before you order, which is much cheaper than finding out on the day the box arrives.
Questions farmers ask
How many chicks per square metre should I brood in week one?
A common planning figure is about 20 chicks per square metre in week one, measured on the usable floor. That is a starting point. Lower it if the brooder is poorly insulated, the litter is damp or the chicks look cold, and raise it only if the heat, the feeders and the drinkers can clearly cope. Check the figure against the birds in the first week, not against what the seller says.
Does the density target change in the rainy season?
It can. Wet weather makes the litter harder to keep dry, and a damp floor is a worse enemy than a little crowding. In the rains, many farmers lower the target a little and open the ring sooner. In the dry season, the litter stays drier, but the heat and the air need more attention. Adjust by the litter and the chicks, not by the calendar alone.
Can I put 100 chicks in a 3 square metre ring?
Only for the first few days, and only if you are ready to open the ring quickly. Three square metres is about 33 chicks per square metre, which is far above the week-one planning figure. The brood will be crowded, the litter will spoil and the chicks will struggle to reach feed. Either buy a bigger ring or split the brood.
How many feeder pans and drinkers do I need?
As a planning count, about two 40 cm feeder pans and two bell drinkers for 100 chicks in the first week, rising to about four of each by week five. Nipple lines and other systems have their own capacities, so check your equipment's manual. Always count the feeders and drinkers against the brood, not just against the floor.
Is space per bird the same for broilers and layers?
No. A broiler brood grows fast and needs its density checked each week until the sale. A layer brood is reared for longer and has its own space plan once the birds are close to lay. Use this table for the early weeks of both, then follow the breed guide and your vet's advice as the birds mature.
What should I do if I bought more chicks than the house holds?
Split the order between two rings or two rooms if you can. If you cannot, slow down the floor opening, add feeders and drinkers early, and watch the litter more closely. The better option is to speak to us before the box arrives, so you can plan the batch size against the space you really have.
How do I know whether my brood is too dense?
Look for chicks piling in corners, wet litter that stays wet after cleaning, a sharp smell by midday, feeders emptied in minutes and birds at the edge that look smaller or hunched. Two or more of these together mean the brood is behind on space, and the fix is to open the ring or split the brood that day.

